To add a logo to your transcript, first login to your account.
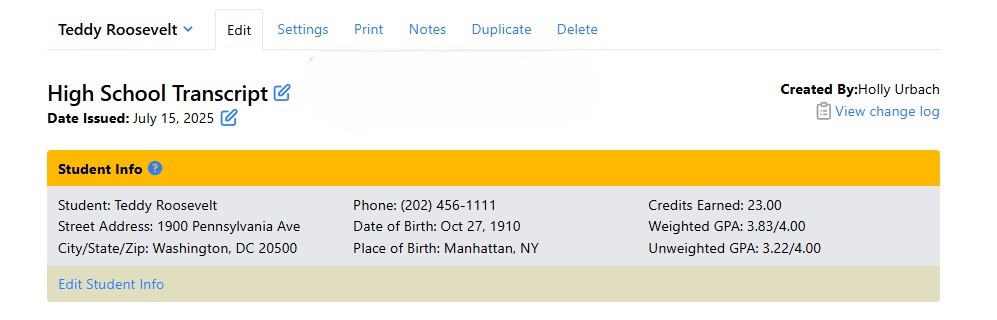
Then select the transcript to which you want to add a logo.
Click on the Settings tab to the right of the transcript you're editing.
After clicking on Settings, a new screen will open with many options. Scroll down until you see Image Details.
To add a logo, click on Choose File, then after the desired file is selected, click on the blue Update Logo button.
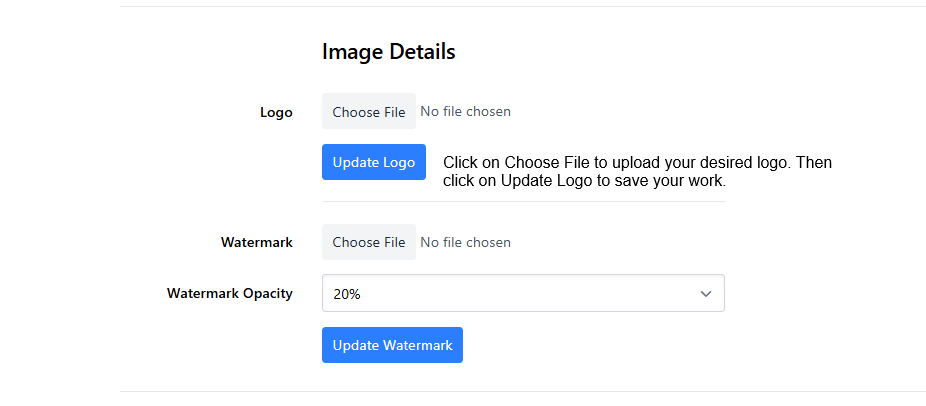
Your logo will appear in the upper right corner of the printed transcript.

To view the logo, click on the Print tab above the transcript. Then follow the process to generate a transcript. Click on the file that was generated to view the transcript with the logo.